Introduction
Microsoft has a web page that tells you how to do this here, but it is a bit out of date. I wanted to learn about BYOML, so I started to play around with it and this post is based on my notes that I took to get everything working correctly.
This first post will get you up and running using the sample data notebook, called AnomalousRASampleData. This notebook is also a bit out of date so I have included the changes needed and will work on getting the official Microsoft Sentinel GitHub repo updated as well.
Additional posts will get you going with the other sample notebooks.
Create Storage Account (optional)
This step is not needed to just use the sample data notebook, but it is listed in Microsoft’s web page so I thought I would include it as well.
This is going to be used to store data from the “SecurityEvents” table in your Microsoft Sentinel instance. You will need to have some Windows machines sending their logs into your instance for this table to have data and, if you are using the legacy Microsoft Monitoring Agent, enable the “Security Events via Legacy Agent” data collector.
I am not going to tell you how to create a Storage Account in Azure as there are plenty of other blogs that tell you how to do that. You can follow those steps to create one.
Send data to the storage account (optional)
Another step that is not needed for the sample data, but if you want to get data into your storage account, use the following steps. These steps are in the Microsoft web page, but there is a formatting issue where the fancy double-quotes were used instead of the basic ones. I really don’t know how else to describe it, but if you look on the page you can see it in the 5th command at the beginning of “DESTINATION_NAME”
Note that all these commands use the Azure Command Line Interface, so you need to make sure you have that installed
The first two commands will log you in and then set the appropriate subscription. If you only have the one subscription, then you can skip the second command. The nice thing is when you login, all the subscriptions you have access to are listed, making it easier to find the one you need. I apologize the code says “C#”, the code formatter I am using doesn’t have an entry for PowerShell.
# Login with Azure CLI
az login

# Set to specific subscription
az account set --subscription "SUBSCRIPTION_NAME"
Now we need to create the data export job. The command is listed below followed by an explanation of the variables
# Export to Storage - all tables
az monitor log-analytics workspace data-export create --resource-group "RG_NAME" --workspace-name "WS_NAME" -n LAExportCLIStr --destination "DESTINATION_NAME" --enable "true" --tables SecurityEvent- RG_NAME – This is the name of the Resource Group where your Microsoft Sentinel instance resides.
- WS_NAME – This is the name of the Workspace where your Microsoft Sentinel instance resides.
- LAExportCLIStr – This can be any name you want. It must be unique between all your data export jobs
- DESTINATION_NAME – This is the full Resource ID of the storage account you created in the previous step. To get this, go to your storage account in the Azure portal. Under the “Settings” section, click on “Endpoints” and select the “Storage account resource ID” string.
- SecurityEvent – This is the name of the table to export. If you want to export more than one table, add the others with a space between them like “… –tables SecurityEvent Heartbeat”
Some other useful commands allow you to list the jobs and delete them.
# List export settings
az monitor log-analytics workspace data-export list --resource-group "RG_NAME" --workspace-name "WS_NAME"

# Delete export setting
az monitor log-analytics workspace data-export delete --resource-group "RG_NAME" --workspace-name "WS_NAME" --name "NAME"
The “NAME” variable in the last line is the name of the export job. If you used the commands above, it would be “LAExportCLIStr”
Create a KeyVault
Next, you will need a key vault to store your Microsoft Sentinel instance’s primary or secondary access key. Again, I am not going to tell you how to create a vault, there are plenty of places that tell you how to do that.
Create a new secret that will store your access key. You will need to know the name of the key for later use.
Create an Azure Databricks instance
Now we start to get into the meat of things. In the Azure portal, find and select “Azure Databricks” to create a new one. Click on the “+ Create” button the header to kick-off creating a new instance.
When creating a new Databricks workspace, all the fields should be self-explanatory. One thing I have done is, under the “Pricing Tier”, I selected “Trial (Premium – 14-Days FreeDBUs)” which allows you to create a free Databricks instance that last for 2 weeks.
You can click on the “Review + create” button after filling in everything on the first page if you like. All the other tabs are optional. It will take a little while for everything to get created.
Once it has been created, go to it and then, on the Overview page, click on the “Launch Workspace” button. This will open the workspace in another tab and log you in.
When you go there the first time, there will be a pop-up asking, “What’s your current data project?”. It really doesn’t matter what you select here, I select “Training ML models (MLflow, AutoML)”
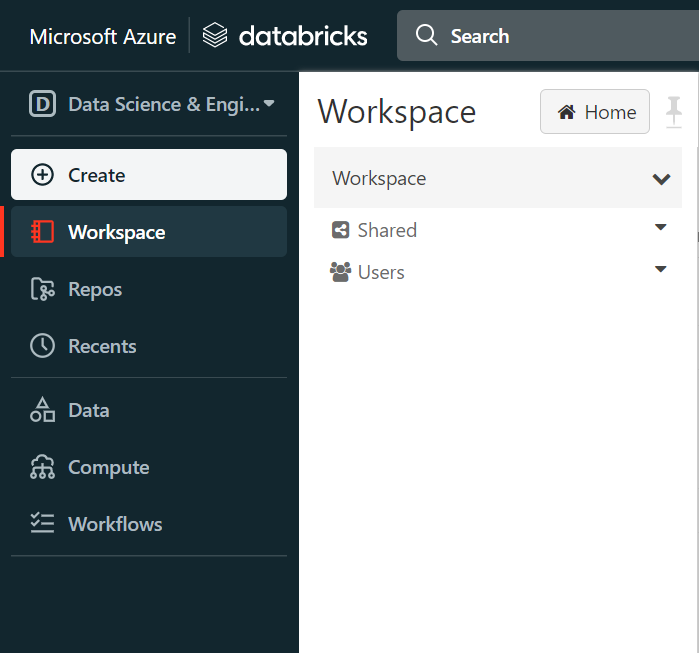
You should see a screen like the one shown below:
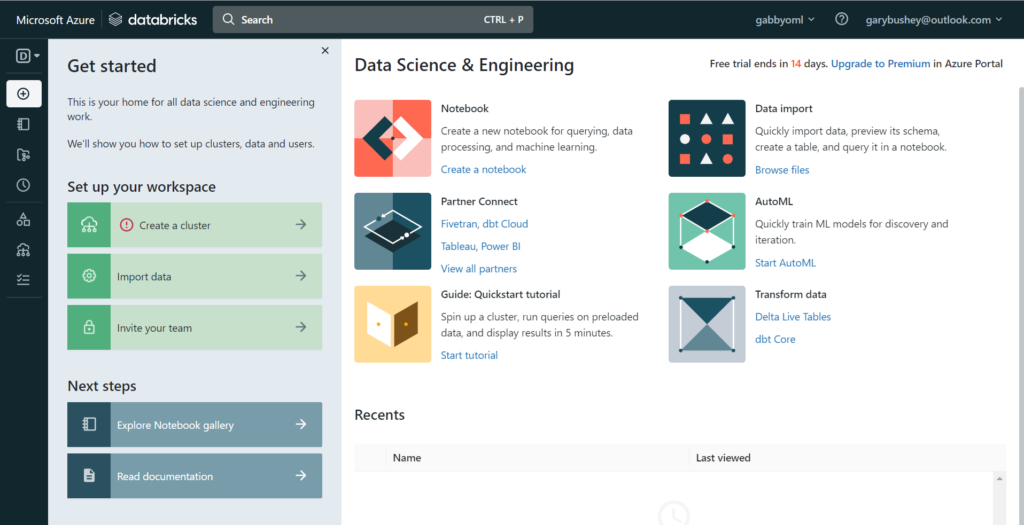
You can close the “Get started” pane as we will go over the steps needed in the remainder of this post.
Create a Compute cluster
The first thing we need to do is to create a new Compute cluster. Mouse-over the menu bar on the left and select “Compute”. This will open the Compute page as shown below
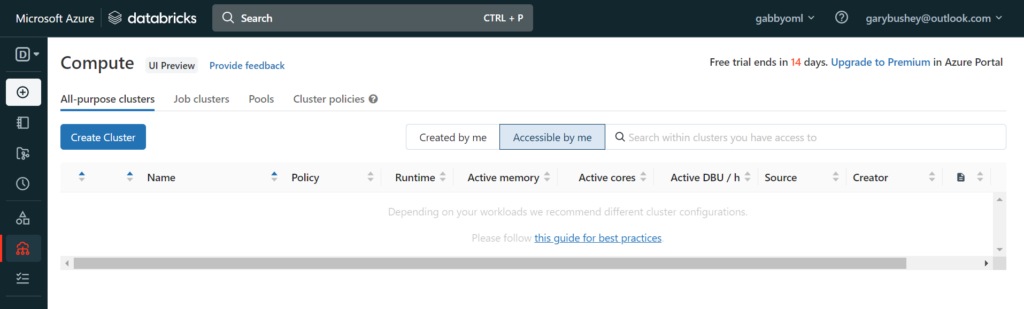
Click on the “Create Cluster” button to start creating a new cluster. This will open a new page like the one shown below. Obviously, it will have your name listed instead of mine 🙂
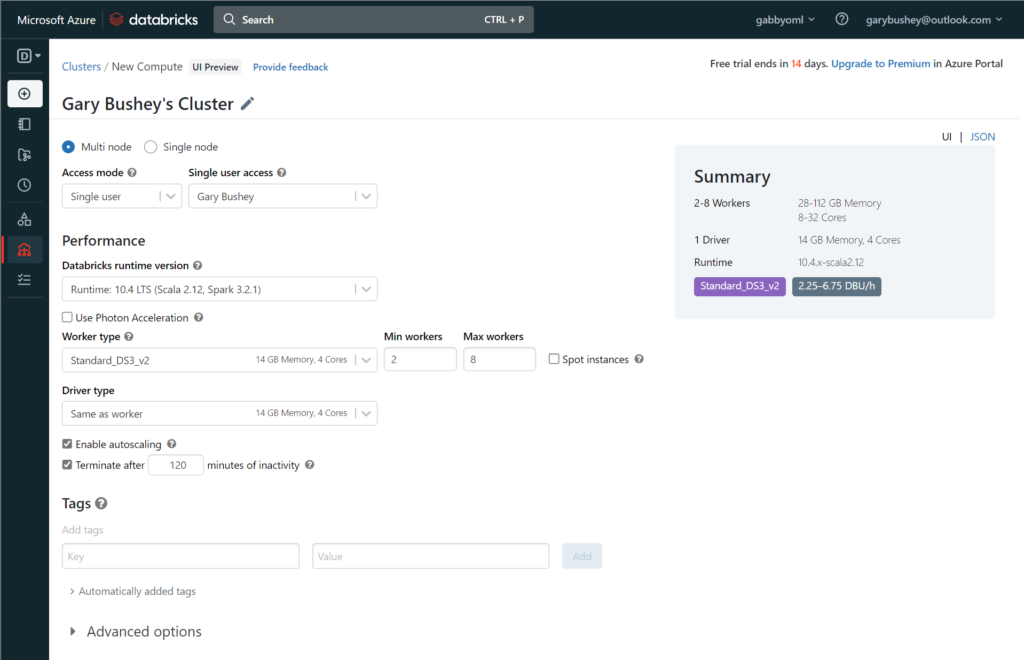
Figure 3 – Create compute cluster
You can leave all the defaults as is HOWEVER I ran into issues with the number of cores my Azure instance has available (I am running on a MSDN instance).
If you look at the “Worker type” dropdown, it shows that the “Standard_DS3_v2” VM instance has 4 cores and there can be a maximum of 8 workers for a total of 32 cores. This is more than my Azure instance allows. What I did, which works for a demo but probably not production, is to uncheck the “Enable autoscaling” checkbox and then set the “Workers” textbox to 1. That is more than enough power for testing purposes. My setup is shown below:
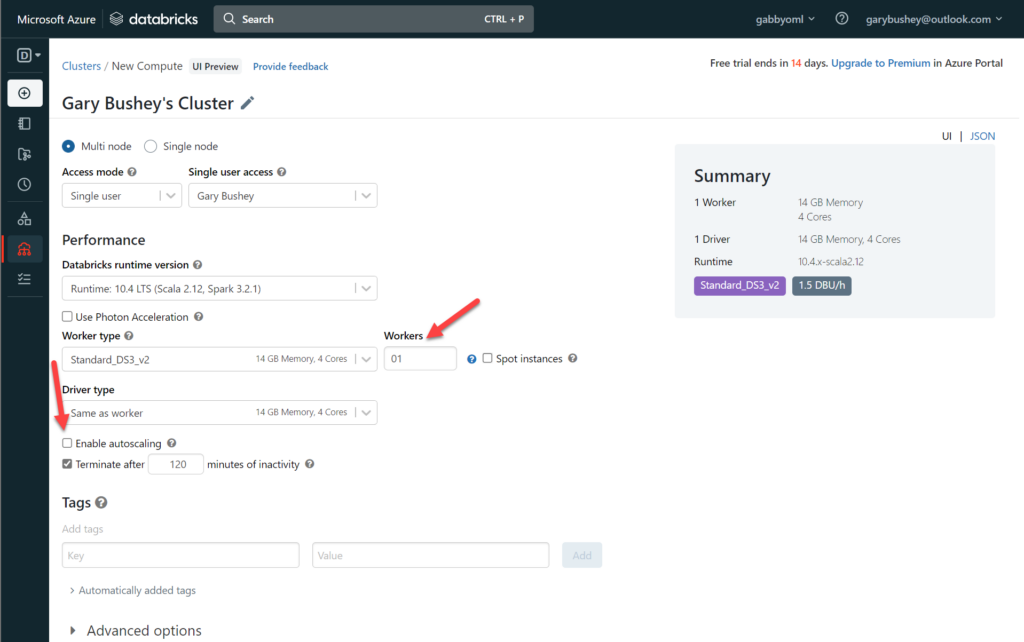
Click on “Create cluster” when ready. This process will take a bit. You can go ahead and upload the notebooks while you are waiting.
Upload Notebooks
The Microsoft Sentinel Github repository, located here, has the “BYOML” folder in it. In the folder, is the “Notebooks” folder.
In the Azure Databricks page, in the left-hand navigation, select “Workspace”. This will open another pane where you can work on the workspace directly as shown below:
Click on the drop-down arrow to the right of “Workspace” and select “Import”. This will open the import pop-up as shown below:
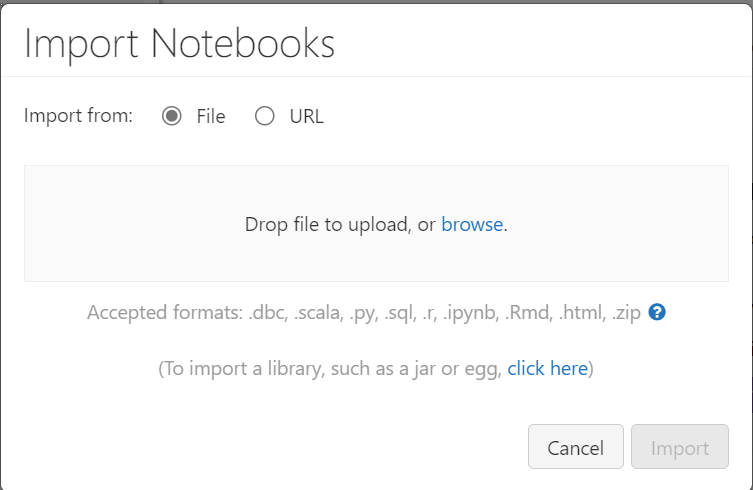
You can either drag a single notebook into this window, click the “browse” button to go to a folder on your local PC, or click on the “URL” radio button and paste in the URL to the file in the GitHub repo and then click on the “Import” button. You will have to do this for each of the notebooks in the “Notebooks” folder.
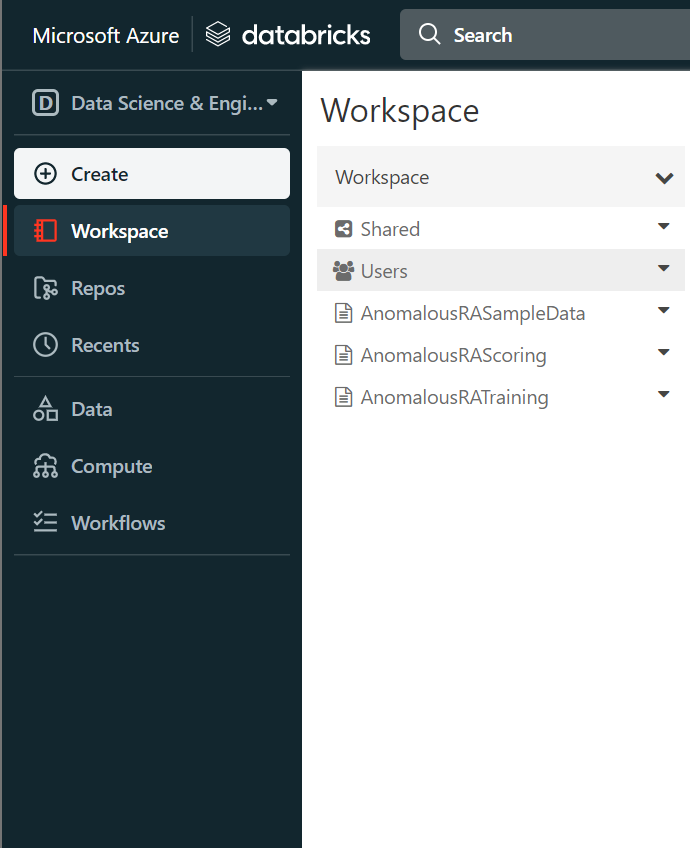
When you are done, it should look like the image below:
Adding needed libraries
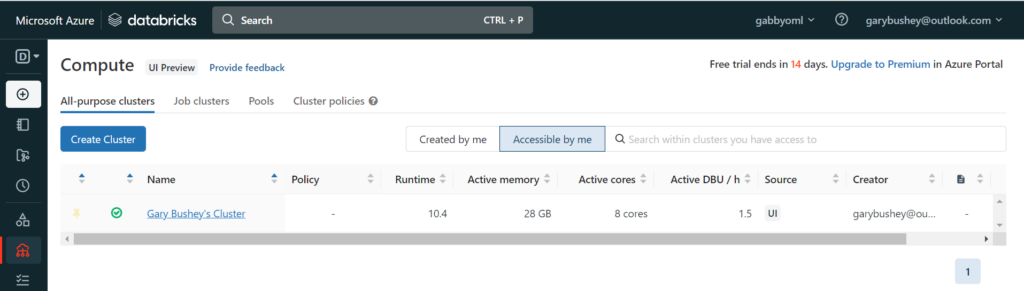
By now, your compute cluster should have been created. Click on “Computer” in the left-hand navigation. You should see your cluster listed as shown below:
Click on your cluster’s name and, in the new page that shows up, click on the “Libraries” tab. This is where we will enter some libraries that the notebooks needed.
The “AnonalousRASampleData” notebook has some libraries listed in the top that need to be installed. The first one is out of date so we won’t be using it, but we will use the others.
In the “Libraries” tab, click on the “Install new” button. This will open up a pop-up as shown below:
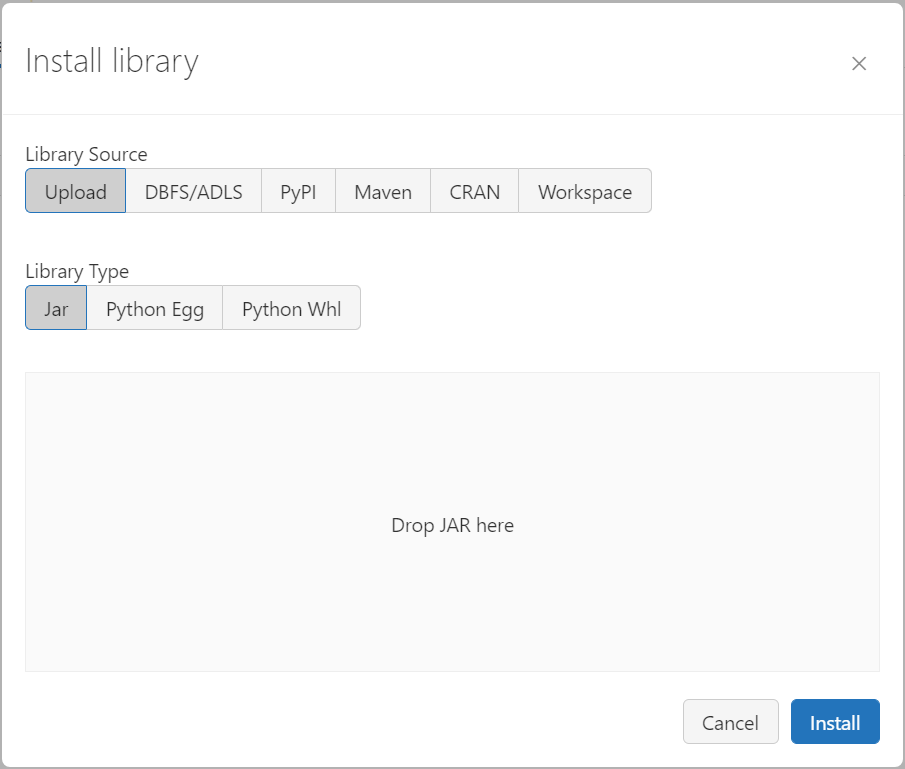
The first library we need to install is the “mmlspark” library which handles most of the data. We will be using what is known as a “Maven” package to install this, so click on the “Maven” tab and enter the following data.
Coordinates: com.microsoft.azure:synapseml_2.12:0.10.1
Repository: https://mmlspark.azureedge.net
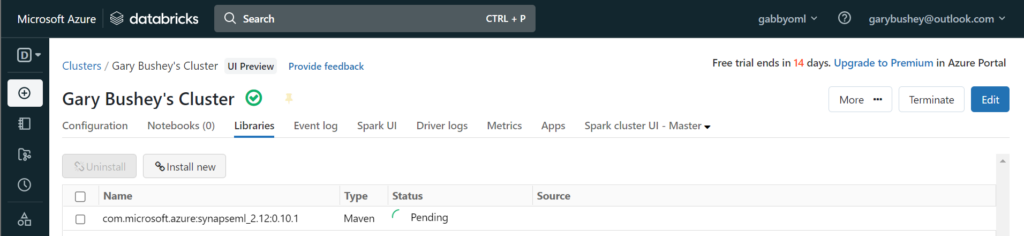
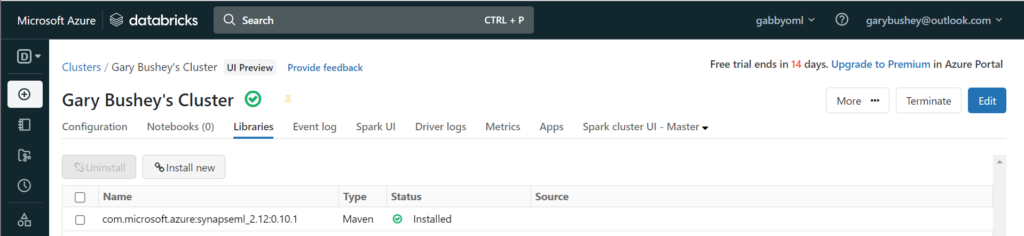
Click on “Install”. The pop-up will close, and the main page will show that this library is being installed
It will take a while but once it has completed, it will look like
Next, we need to install the “plotly” library which allows for some nice look graphs and charts. This is done a little differently. Click on the “Install new” button and in the pop-up window, select the “PyPi” tab. In the “Package” textbox, enter “plotly” and click on the “Install” button.
This will go through the steps listed above while it is installing.
Finally, we need to install the Azure Sentinel utilities package that is in the GitHub repo. Once again, click on the “Install new” button. This time we will leave the “Library source” tabs alone, but we need to click on the “Python Whl” tab. Unlike when we installed the notebooks, you have to drag the file here. Not sure why you cannot even browse to the file, let alone obtain it from a URL.
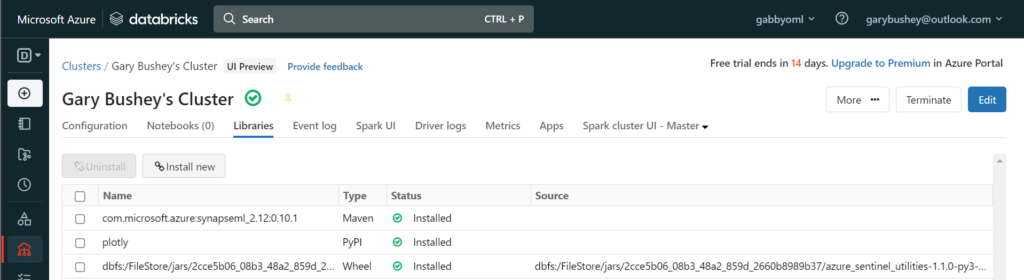
If you do not have this file on your computer, you will need to download it from the GitHub repo. It is under the “Libraries” folder under the “BYOML” folder and is called “azure_sentinel_utilities-1.1.0-py3-none-any.whl” and will allow for interaction with some of the Microsoft Sentinel tables.
Once all the libraries have been loaded, your page should look like:
Just to be safe, I reboot my cluster at this point. On the upper right-hand part of the page is the “More …” button. Click that and then select “Restart” from the drop down list.
Create an Azure Key Vault backed secret scope
I am taking these steps from here. While I am using the UI instructions, there are instructions for doing this via the CLI as well.
In your Azure Databricks browser tab, you will need to modify the URL. Not sure why there isn’t a link to this next step in the UI. In the URL, you will delete everything after “.azuredatabricks.net” and replace it with “#secrets/createScope”. This must be pasted exactly as the URL is case sensitive.
You URL should look like:

This will take you to the “Create Secret Scope” page. Here you will enter information that will link your Azure Databricks back to the Key vault you created earlier as shown below:
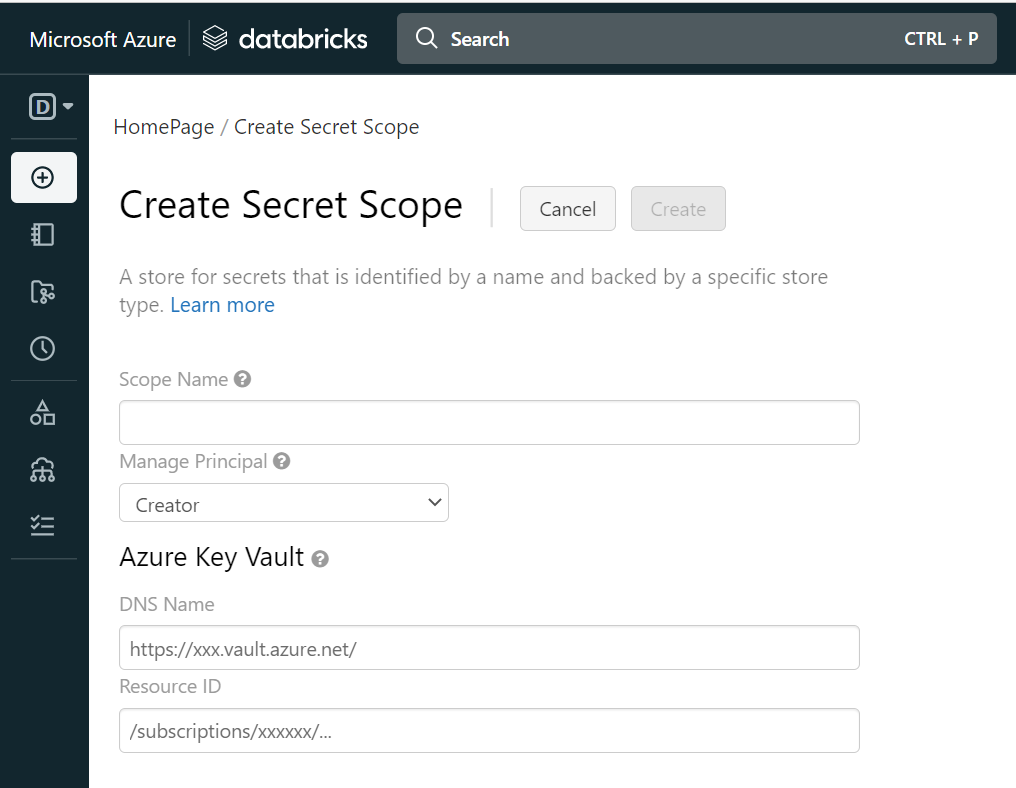
Fill in the following fields:
Scope Name – Use any name. You will need this data to enter into the notebook
DNS Name: This is the DNS name of the Key vault. You can get this from the Key vault’s Overview. Copy the “Vault URI” and paste it here.
Resource ID: This is the full Resource ID of the Key vault. You can get this from the Key vault’s properties page. Copy the “Resource ID” and paste it here.
Click “Create” to create the scope. It should be done very quickly and you will be taken back to the Azure Databricks overview page.
Modify the Notebook
Click on “Workspace” in the navigation bar and select “AnomalousRASampleData”. This will open up the notebook where you can change and run the steps.
The first thing we need to do is enter the information that pertains to our environment. These changes are in the “Cmd 3” section.

The first thing is to replace “YOUR_WORKSPACE_ID_HERE” with the ID of your workspace. I don’t have to tell you where to get that, do I? 😉
Next, change “YOUR_SCOPE_HERE” with the name of the Secret scope you just created in the previous step.
Finally, change “YOUR_KEY_HERE” with the name of the secret in your Key Vault that you created to store your workspace’s key.
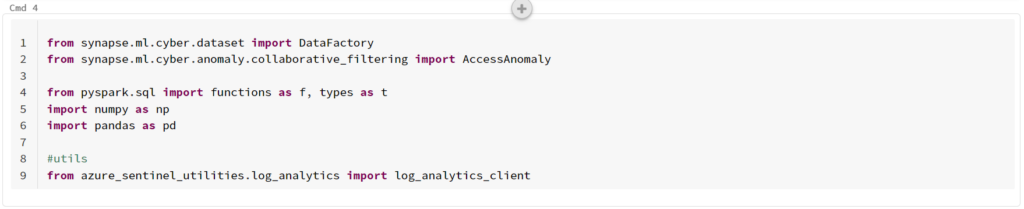
Now, we need to update the code to use the newer library we installed. This instructions at the top state to install “mmlspark” rather than the “synapseml” that we install. “mmlspark” is an outdated library so we did not use it. However, “synapseml” uses a different namespace so we have to make a small change.
In the “Cmd 4” section, replace all instances of “mlspark” with “synapse.ml”. When done it should look like:
Now you can go ahead and run the notebook! You can either do it step by step, which I recommend so that you can see what each block does, or you can just run everything at one go. There are few steps that take some time depending on how you configured your computer cluster, but they are interesting to watch.
Completed!
After everything has finished running, you can go into your Microsoft Sentinel instance and query the “AnomalousResourceAccessResult_CL” table. You should see some data like:
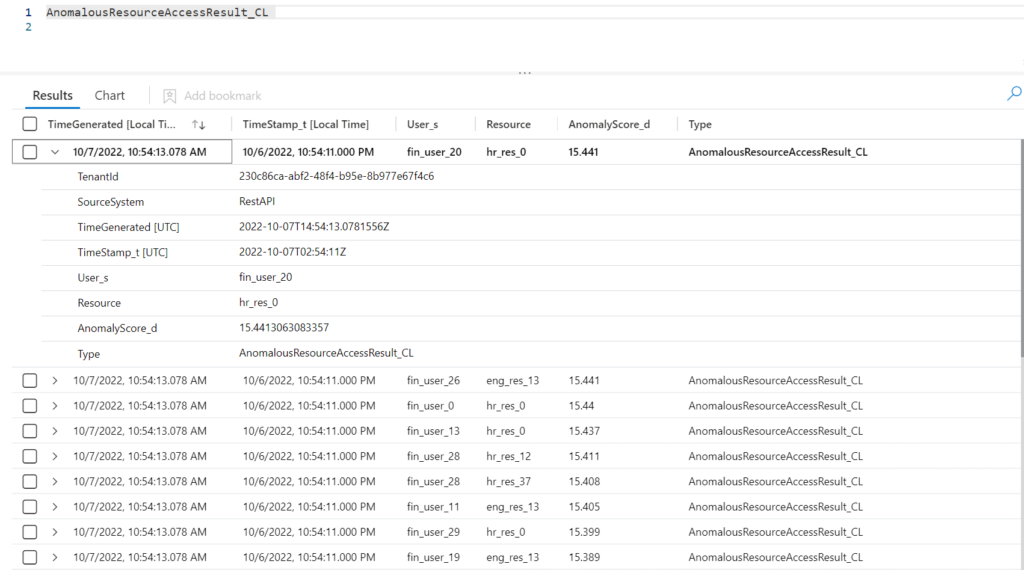
You can then use this table like you would any other table in Microsoft Sentinel.
Summary
I have been wanting to write this blog post for a while now. I had tried to use Microsoft Sentinel BYOML a while ago and didn’t get too far. Now that I have figured out the steps, I thought I would try to explain it in clearer terms than is in the Microsoft web page.
If you have some ideas for ML for you Microsoft Sentinel instance, hopefully this will tell you how to get going.
Once I get a better understanding on the other two notebooks, I will write a post going through them, step by step.